
Virtual Home Lab - part 2
Here we are, albeit after some time, with the second article on how to create your own virtual home lab.
After an introductory and generic first article we will see today the solution based on ProxMox. In particular, the installation process together with a whole series of small tricks useful for solving various problems encountered.
We insert our USB hub with the mouse and keyboard connected on one of the front ports. On the other we connect the USB stick with Ventoy and the ProxMox ISO.
Remember to connect the network cable to one of the interfaces. In our case we will use the 2.5Gbps one.
Let’s start the MinisForum H80 and press F7 so that we can choose the correct entry from the boot menu.
ProxMox after the first initialization operations seems to get stuck on a similar screen:

In few minutes, we will finally see the Proxmox VE Installer wizard appear.
Here below a summary of the various screens that appear:
1. END USER LICENSE AGREEMENT (EULA):
    * click on "I agree" to accept the license
2. Proxmox Virtual Environment (PVE):
    * select the main SSD (/ dev / nvme0n1) in the combo "Target Harddisk"
3. Location and Time Zone selection:
    * Country: Italy
    * Time zone: Europe/Rome
    * Keyboard Layout: U.S. English (or Italian depending on your keyboard)
4. Administration Password and Email Address:
    * Password: pass1234
    * Confirm: pass1234
    * Email: testmail@local.lan
5. Management Network Configuration:
    * Management Interface: enp4s0
    * Hostname (FQDN): pve.fritz.box
    * IP Address (CIDR): 192.168.178.200 / 24
    * Gateway: 192.168.178.1
    * DNS Server: 192.168.178.1
6. Summary:
    * Summary of all information previously entered
    * Flag on "Automatically reboot after successful installation"
Once you have clicked on the “Install” button, the installation procedure will start. Don’t worry if it seems to get stuck at 3% for a few minutes while creating logical volumes ("create LVs"). When at 5%, the installation proceeds smoothly, completing in a few minutes.
The last wizard screen appearing for a few seconds leaves us the details on how to connect to the machine via the web interface after the upcoming reboot.
Unfortunately, we immediately realize that the system remains blocked with a message like the one in the photo below:
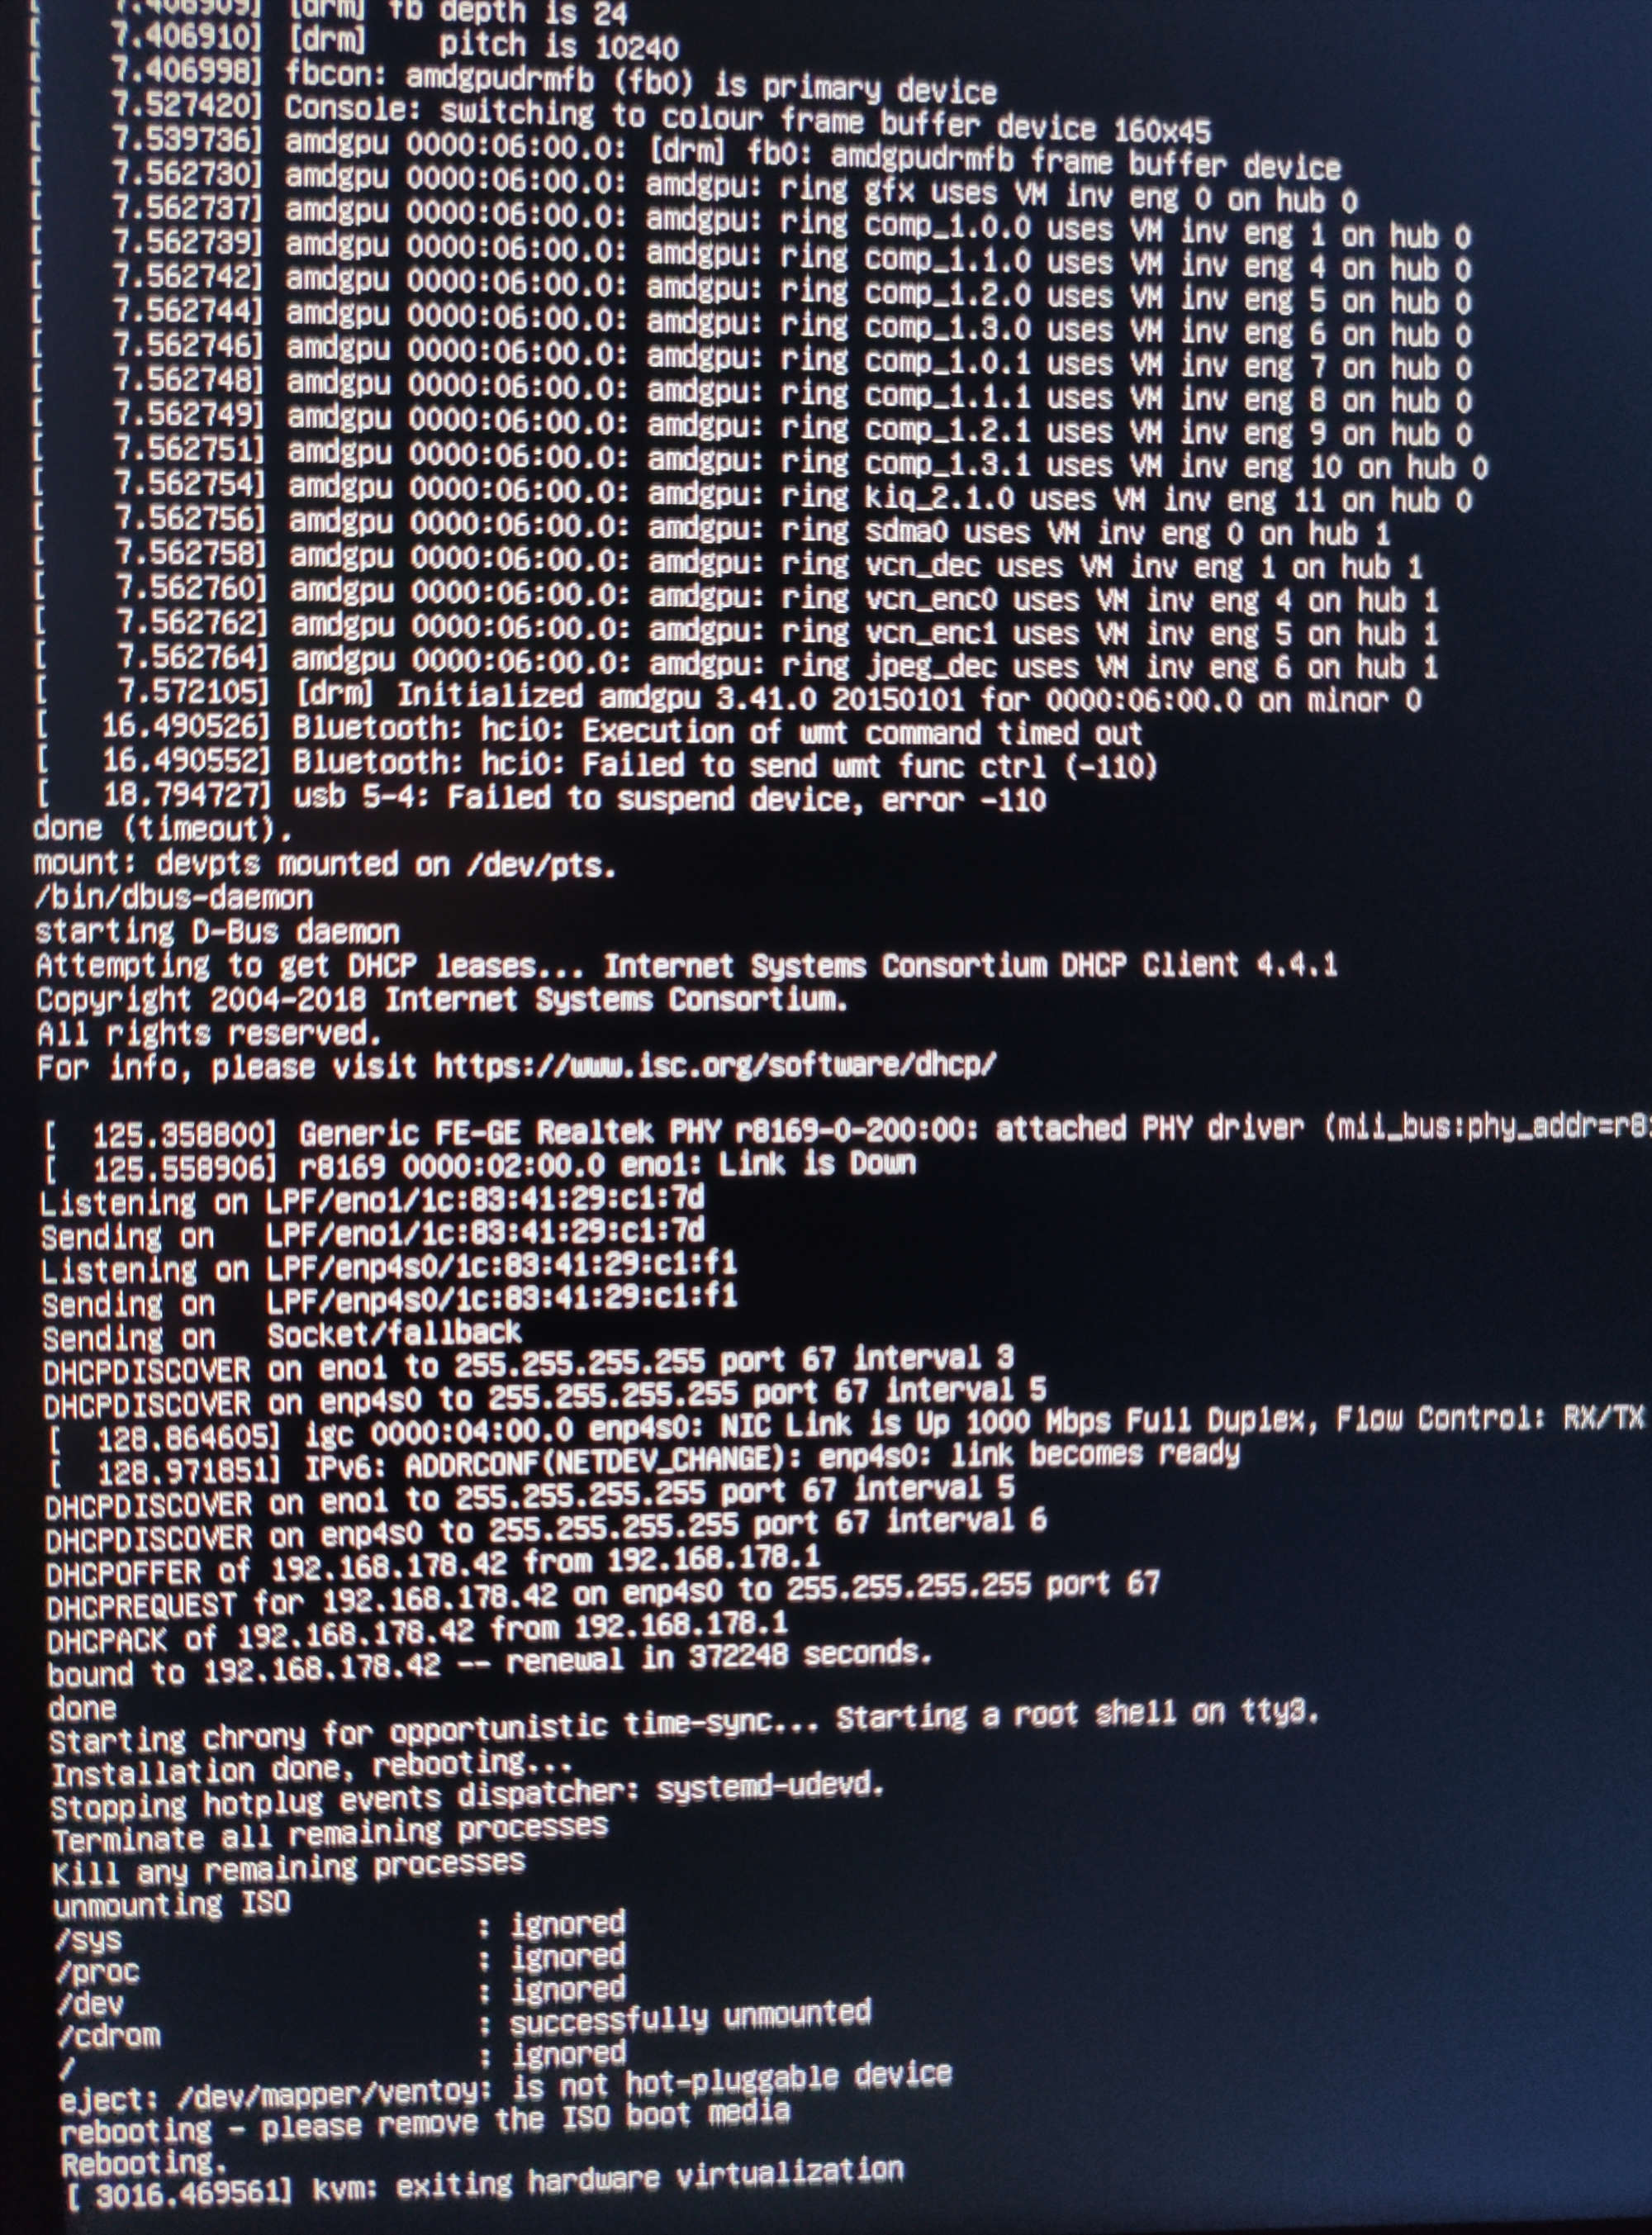
We need to press the power button for a few seconds to perform a forced shutdown. With the USB key removed, on the next reboot we find ourselves in front of the classic GRUB screen, before the actual start of Proxmox VE.
Unfortunately, we face again the error message and need to wait few minutes before seeing the Proxmox login screen appear.
Trying to connect via browser to the address we configured during installation http://192.168.178.200:8006/, we realize that
we can’t reach the server.
Apparently something went wrong with the network card initialization. We log in to check what it is wrong. We try to use the DHCP client to check if we can get a valid IP address.
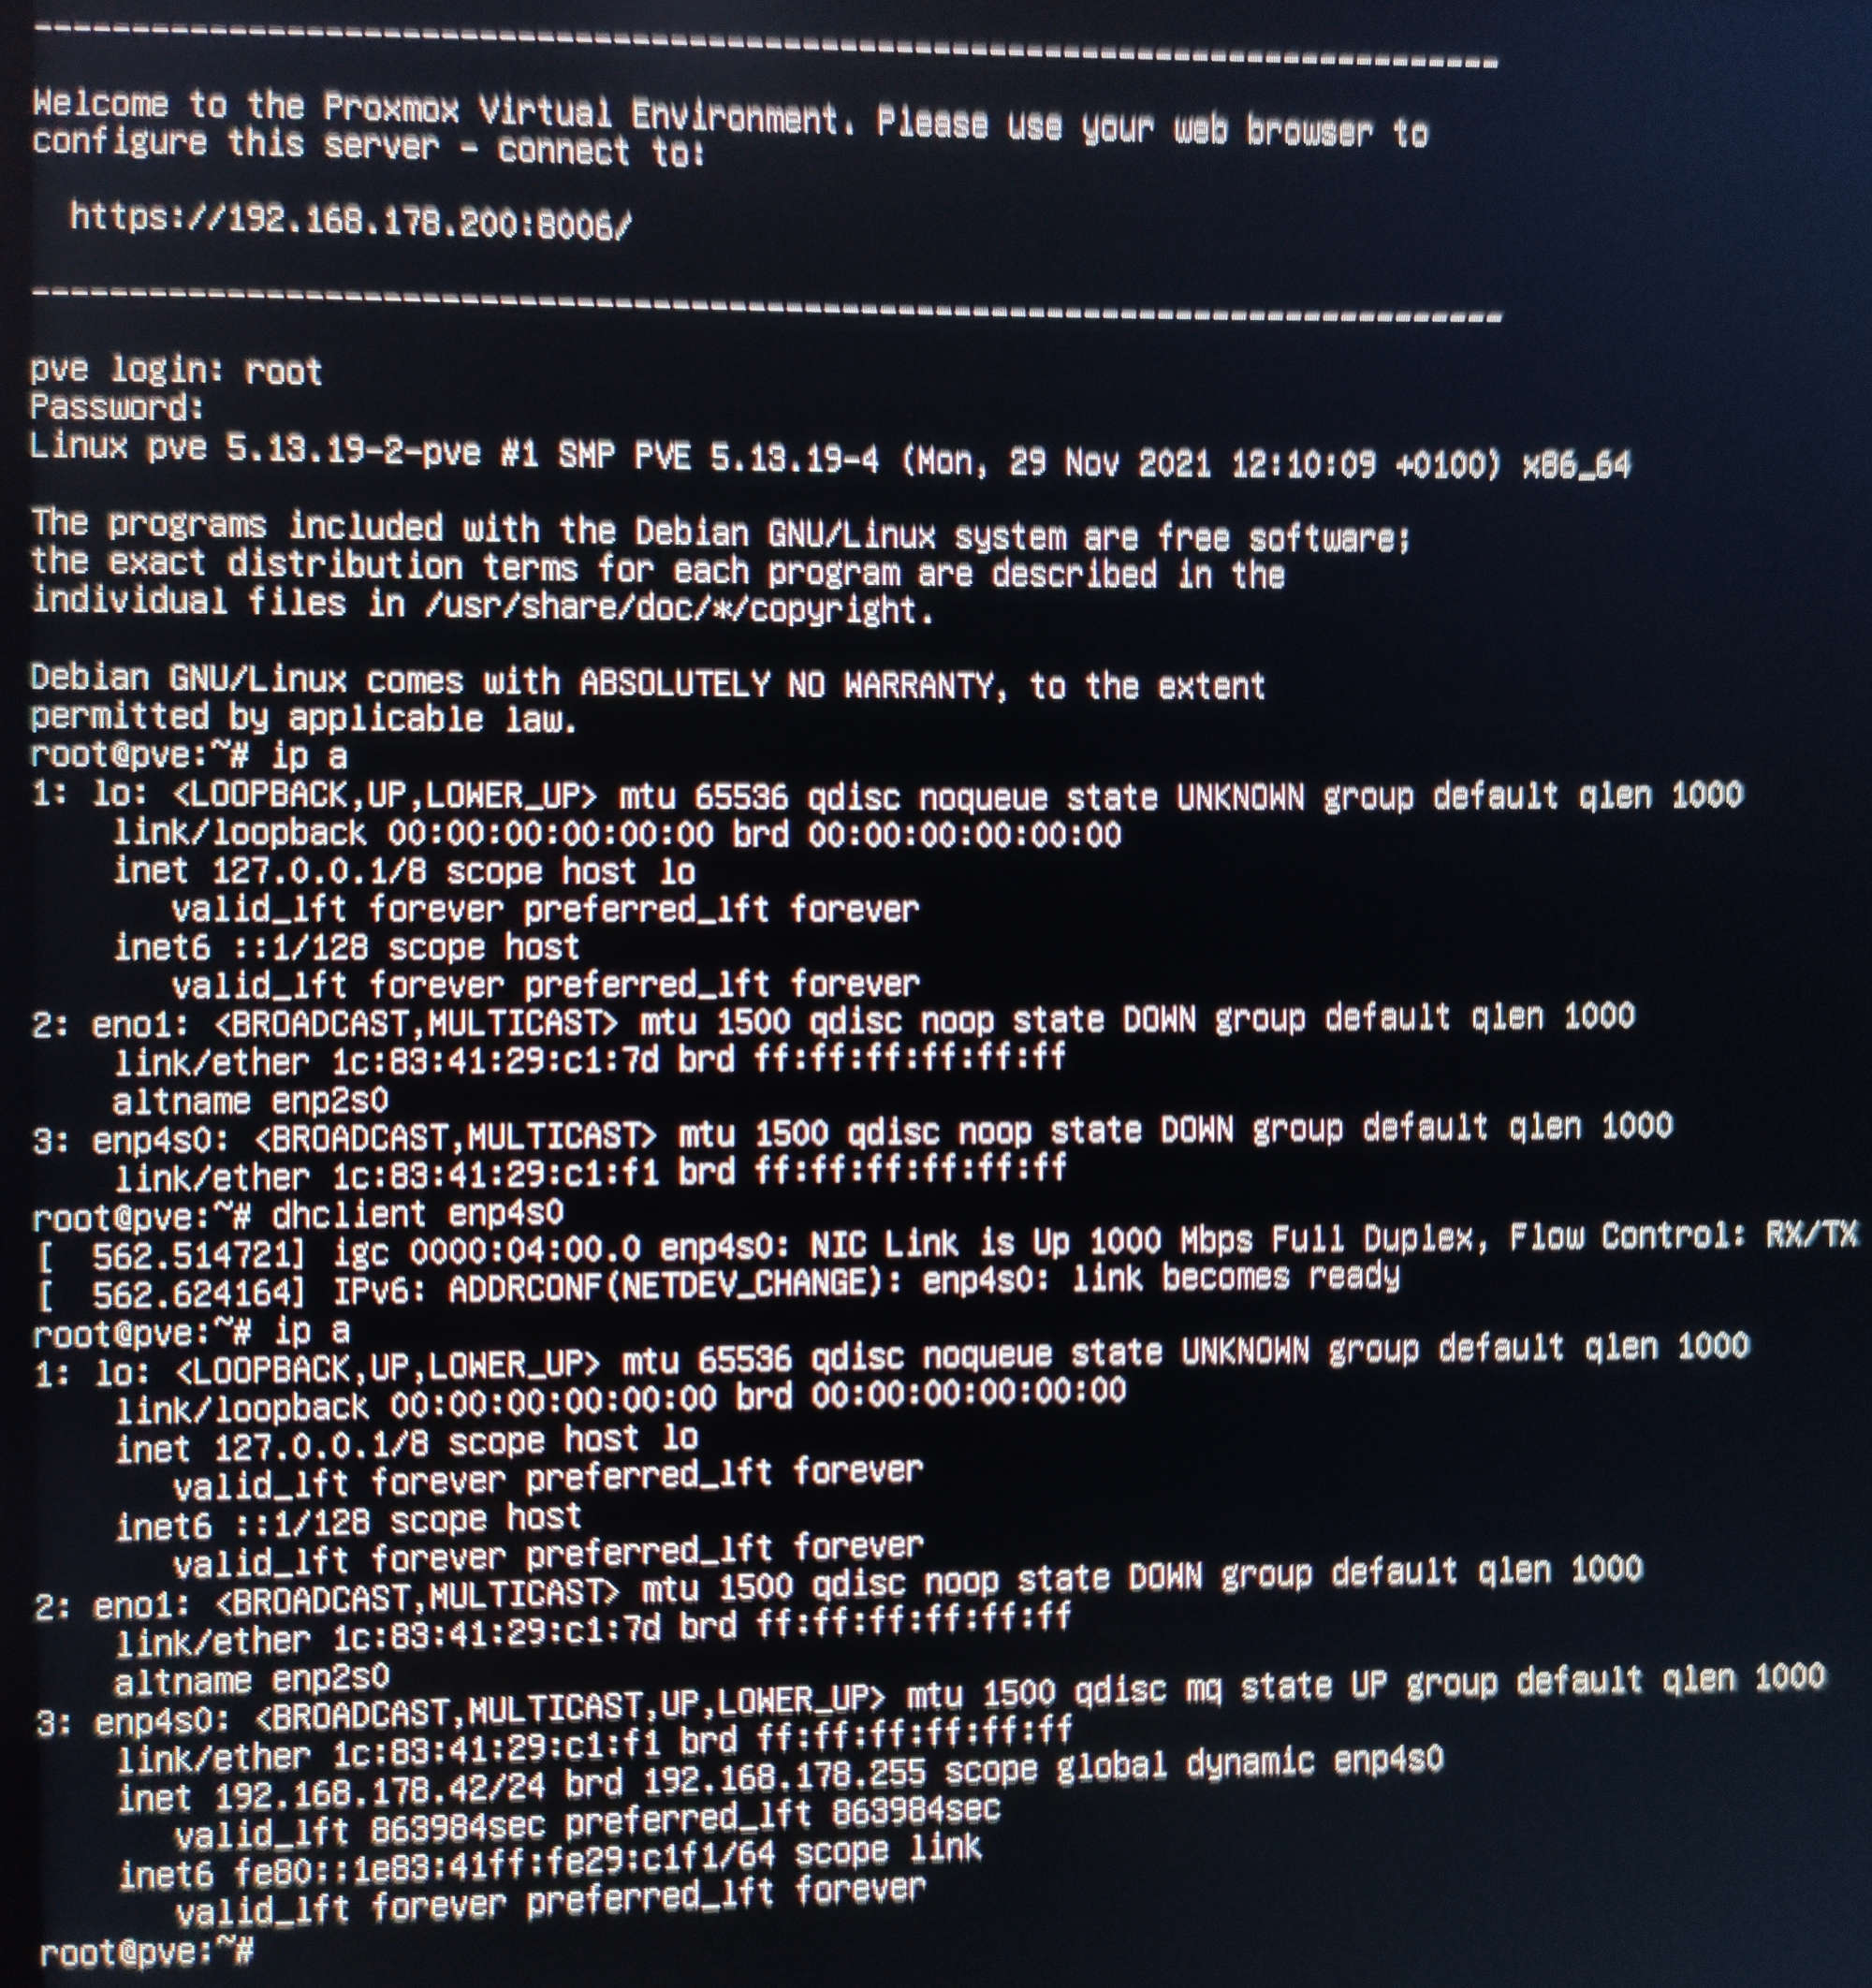
Trying now to connect to the new address, we can successfully access the Proxmox web login screen.
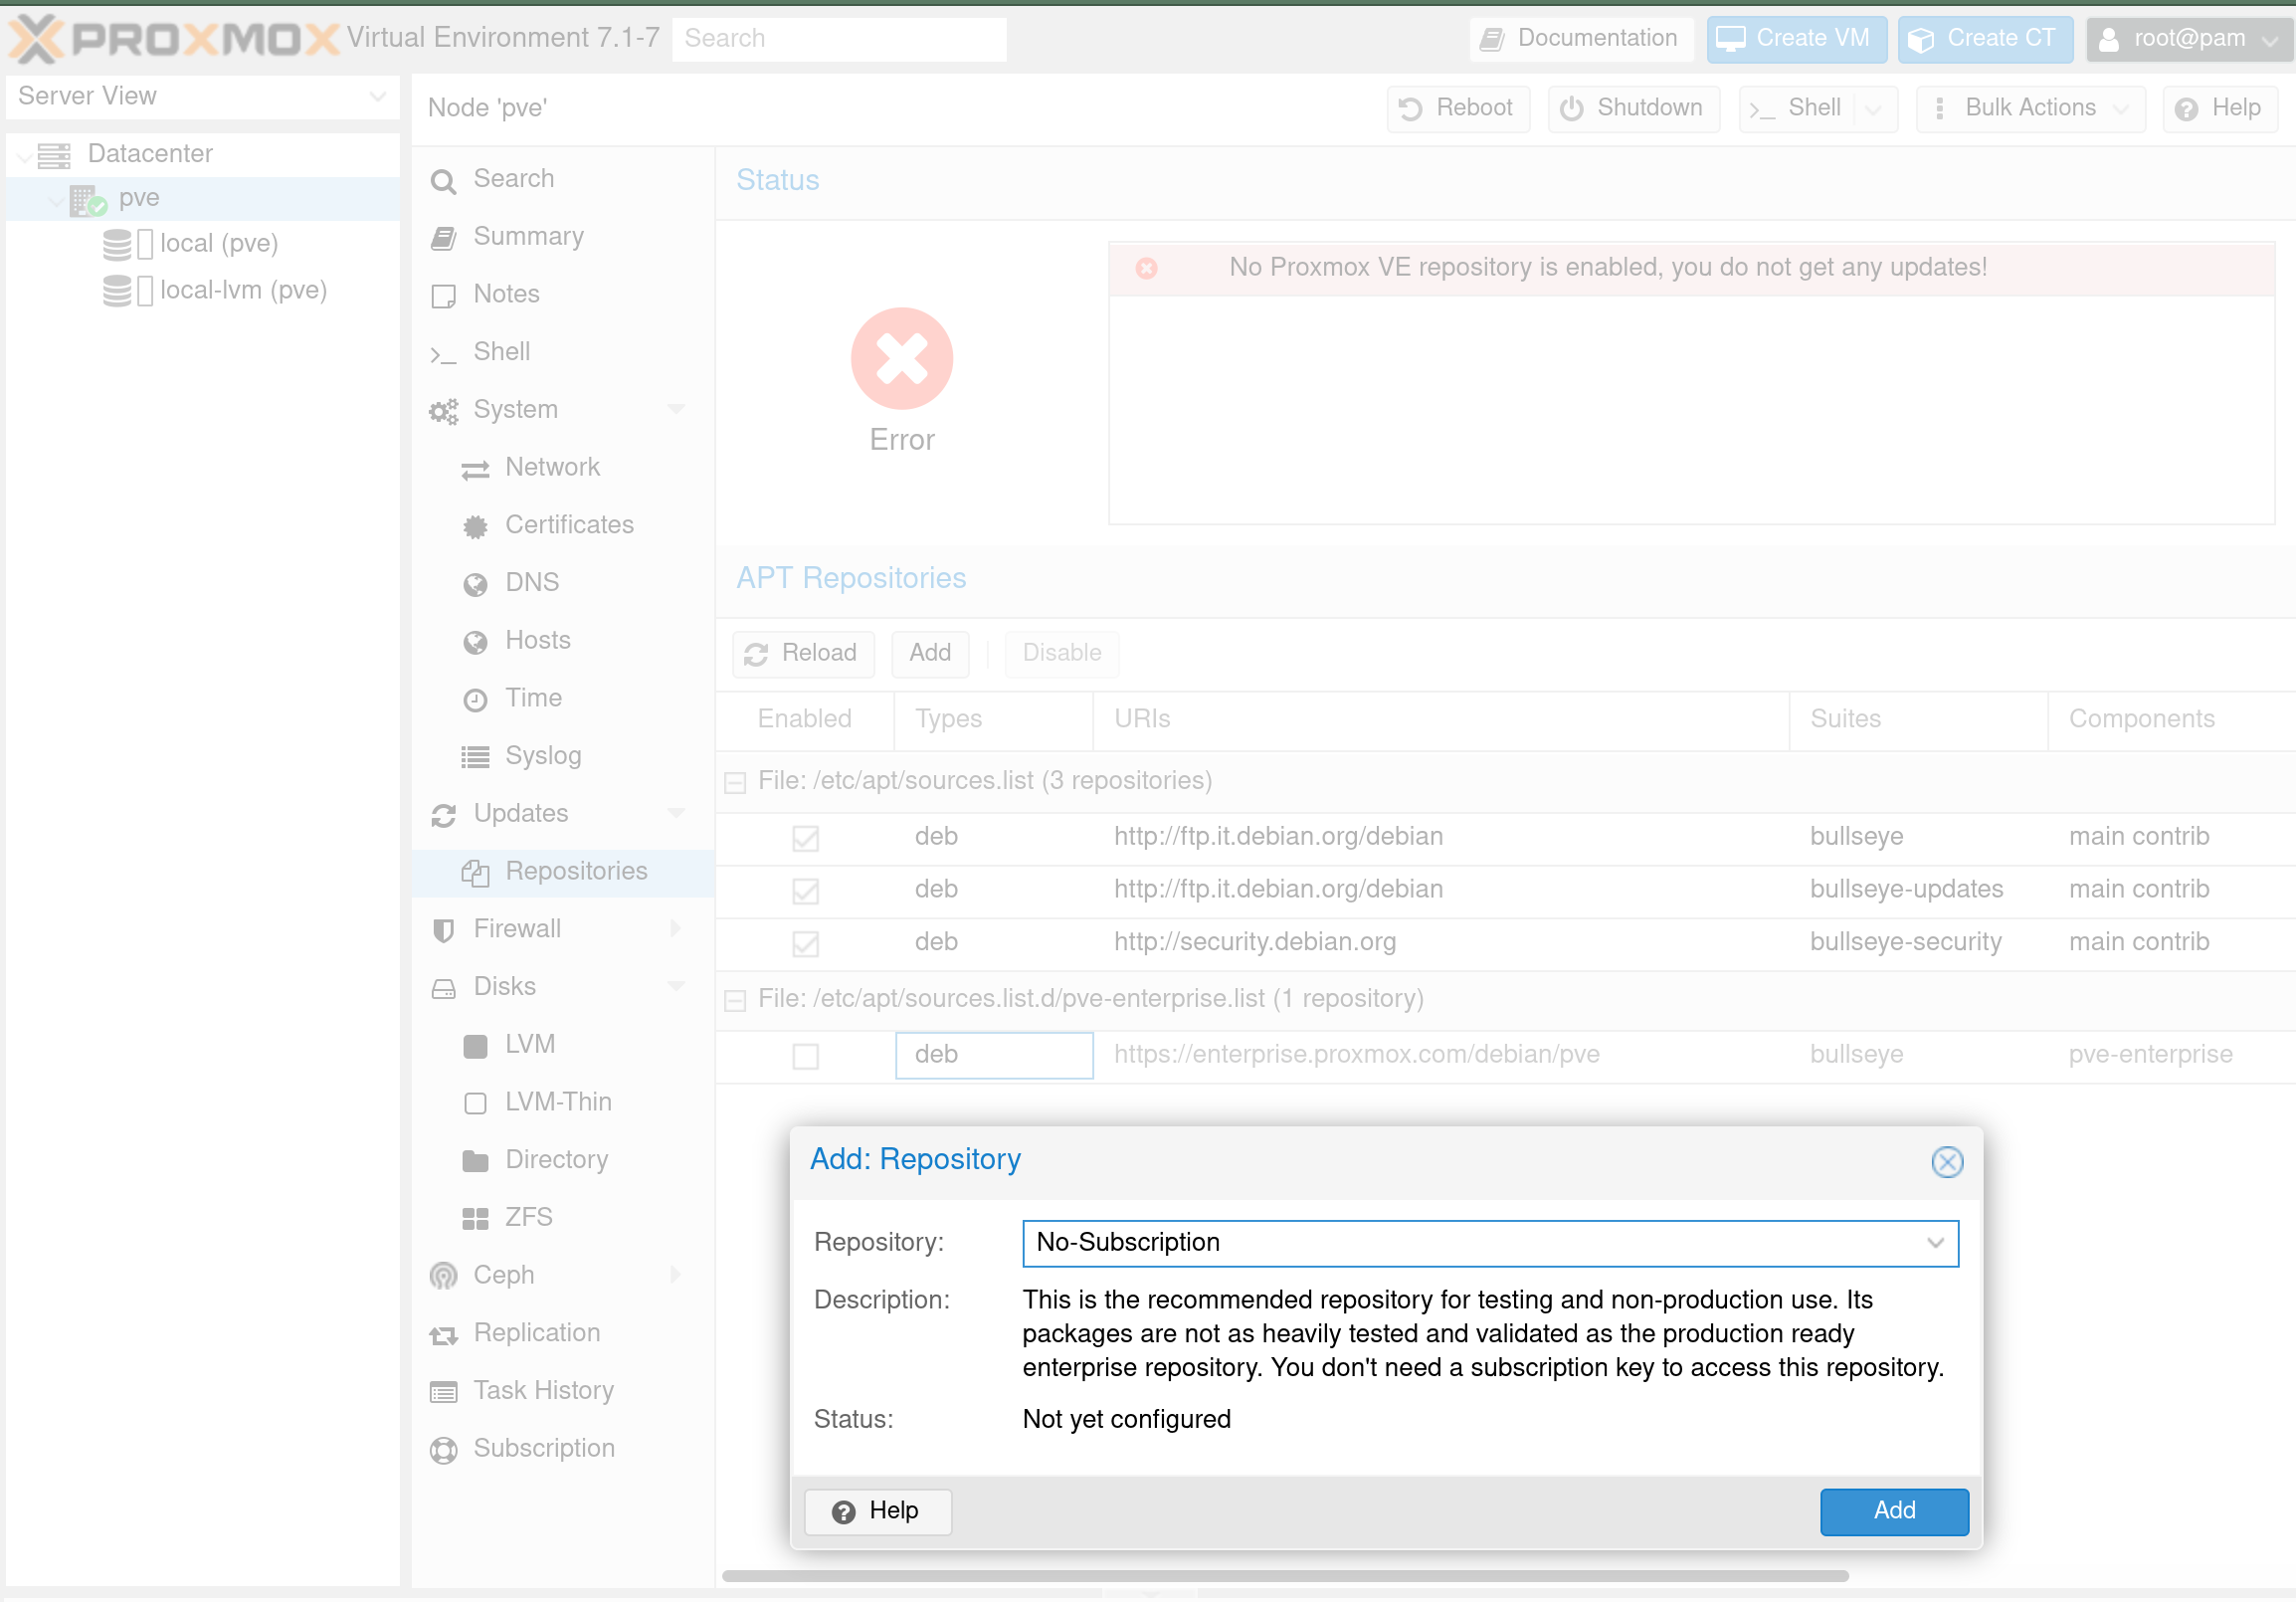
The first thing to do is to add a valid repository so that we can successfully update our system.

Not having a paid subscription, you can see the prices on the dedicated page, we will proceed to use the “free” version of the repository.
-
Select the section Promox Node (pve)> Updates> Repositories
-
We disable the “enterprise” repository since we will be using the free version
-
We add the new repository by selecting “No-Subscription” from the combo-box
Now let’s open a shell and try to update the system.
The current version of the (buggy) kernel installed: Linux pve 5.13.19-2-pve #1 SMP PVE 5.13.19-4 (Mon, 29 Nov 2021 12:10:09 +0100) x86_64

Once completed, we issue the command reboot to restart the system. For the last time (hopefully) we do the forced shutdown via the power key.
On the next restart the system loads fast and the network interface is correctly enabled.
We can access the Proxmox web page using the IP given during installation.
The newly installed kernel: Linux pve 5.13.19-6-pve #1 SMP PVE 5.13.19-14 (Thu, 10 Mar 2022 16:24:52 +0100) x86_64
Our Proxmox installation works, and we can now proceed by creating virtual machines or LXC containers. We will not show here how to create a Linux / Windows VM or a Linux container. Maybe in some other article / video in the nearly future.
I just want to add few details related to the troubleshooting I performed during the Proxmox installation. As you can see, it was not a “simple and painless” operation. This video of a German Youtuber and this article on the official Proxmox forum helped a lot.
In fact, when I started my first tests with Proxmox on the Minisforum, no updates available were
solving the delay problems during startup or the “stuck shutdown” effect. The same for the problems with the network card.
The proposed solution was to downgrade the kernel version and then block its upgrade.
For completeness I put below the commands used back then, and taken from the video/forum:
# Installing a working kernel
apt install pve-kernel-5.13=7.1-4
# Removed the buggy kernel
dpkg -P pve-kernel-5.13.19-2-pve
# Preventing kernel upgrades
apt-mark hold 'pve-kernel-5.13'
Fortunately for us, later upgrades solved all the issues.
To conclude, I’ll leave a list of useful resources to get started with Proxmox and deepen its use: